Visar inlägg med etikett DT Nettan. Visa alla inlägg

tisdag 15 november 2011

Tuesday Tip - Pull out card

Hi again :)
Today I´m going to show you one way to make a "Pull Out Card".

This is what you need:
  • a paper, cut in 15x20 cm - with pattern on both sides
  • cardstock in one colour, cut in 13x8,5 cm
  • string/lace
  • two-sided tape
  • 3D-pillow
  • something to make a cirkel with
  • chalk
  • eyelet
  • cutter and a cuttermat or a scissor
  • stamps

Take the twosided paper and mark the middle at the long side, 10 cm.


Then you mark 4,5 cm at both sides from the middle.


Now it´s time to fold both sides at the 4,5 cm mark. I´m using my "Fiskars cuttin machine"


Whell... now it´s a little bit tricky, you have to cut out a piece in the middle of the paper. I´ve maked my hole after the stamp I´m going to use later(10x2 cm) Mark out where you will put your hole, at the center of the card - between there you fold earlier.


Now it´s time to use the circlecut, I´ve used a QC-cirkel at the end of the paper.


Use two-sided tape and put the card together.


This is how it looks when it´s almost done :)
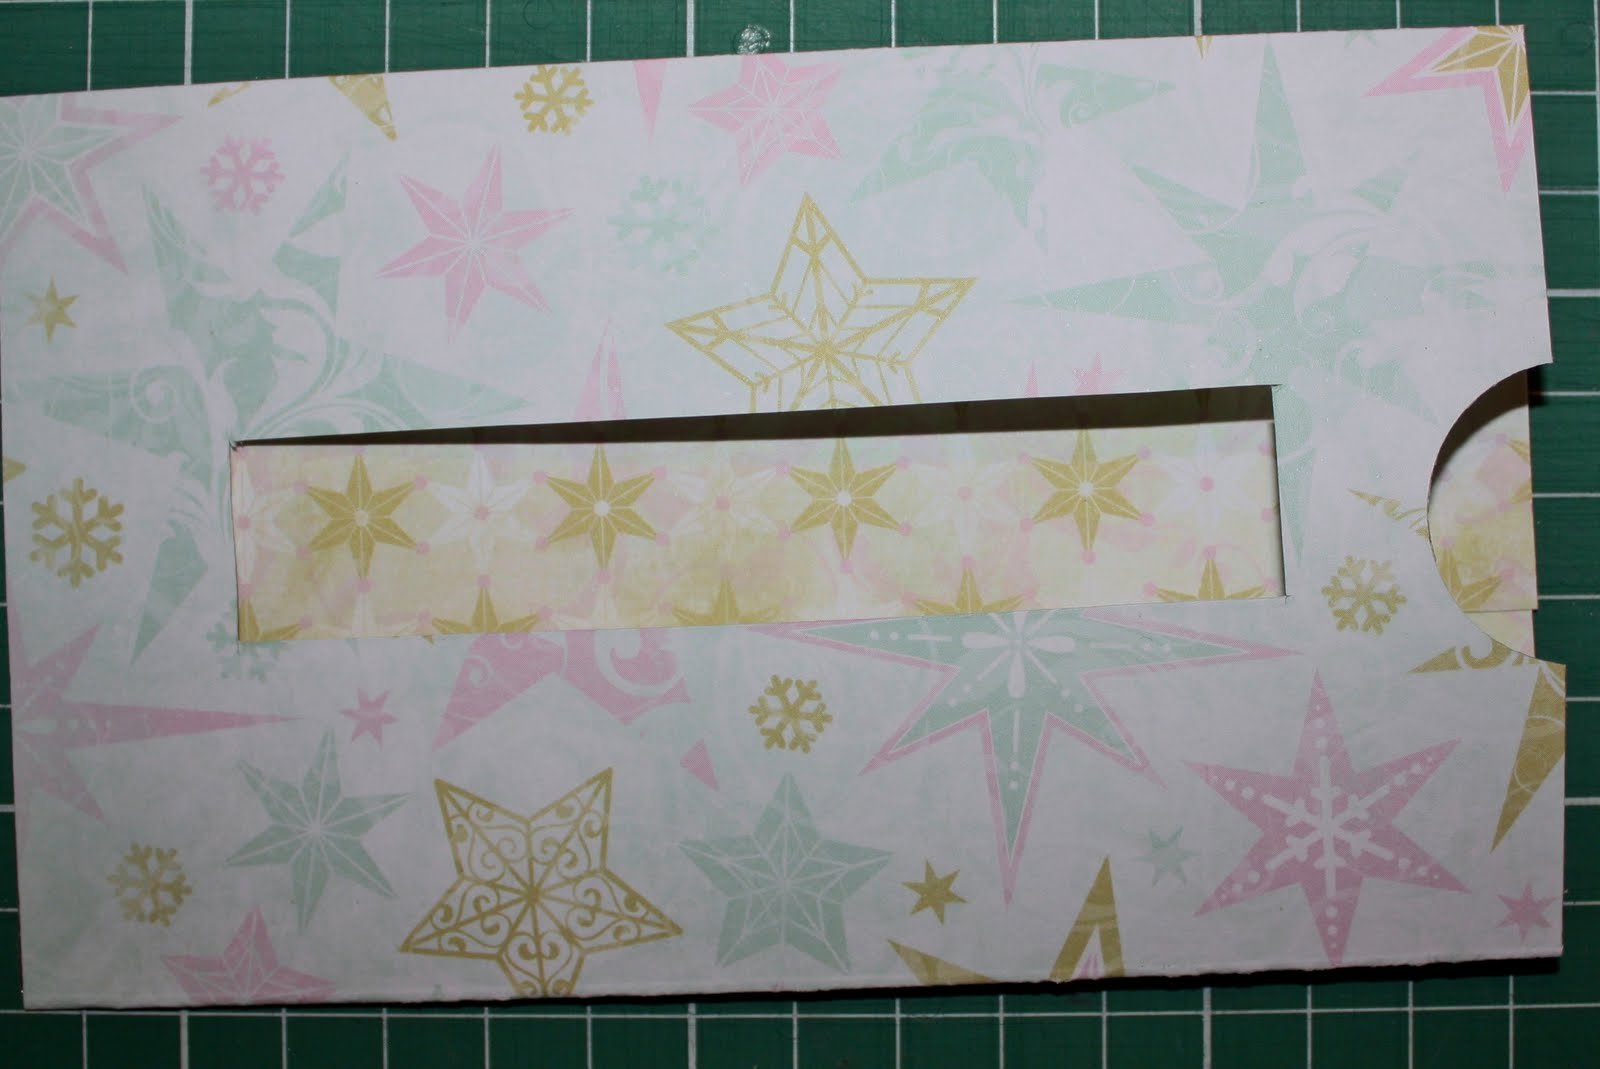

For the "tag" inside - use the cardstock. If you want, cut the edges at one shortside.


Chalk the sides and put the Eyelet at the shortside.


I used the stamp:" T49, Välkommen till värden", but I cut of a bit...
and stamped in the rectangle.


Chalk the edges and pull in the cardstockpiece. Cut out a circle in thicker paper,
put a deco at it or a stamp. I´ve used the stamp: "J92, Julskinka". At the back put a 3D-pillow and attach it to the cardstock (still pulled al the way inside)


I chosed to use string this time but it´s very pretty wih lace to.... Now you can
write a message at the tag - my says: to christmaslunch....


Have a nice time doing this!!!
I´ll hope you enjoys it :) Don´t forget to breethe between
all "must do things" which seems to pop up this time of year....

Love Nettan

måndag 14 november 2011

Sketch of the week

This week it´s my turn to make a sketch for You, here it is:


In this time of the year, I´m starting to get some Christmasfeelings... So for inspiration I´ve make a Christmascard with the stamp:
J83, Jultomte i gungstol.


Hugs Nettan

onsdag 7 september 2011

Julig LO

När de nya stämplarna damp ner i brevlådan fick jag helt plötsligt
inspiration att ta tag i mitt dåliga samvete, de sista fotona från förra julen...

Fotona är tagna på min son Liams och hans första Luciatåg.
Bakom den vita rektangeln gömmer sig resten av hans dagisgrupp...

Här har jag använt stämplarna:
"Det lilla ljus jag har", J93 och "Tomtenisse med paket", J70.
färglagda med Promarker.

Glöm inte att titta in i shoppen... så många fina nya (och gamla) stämplar!

Kram Nettan

Årets första julkort

med en av de nya stämplarna som släpptes idag.
Jag har färglagt med Promarker och använt restpapper
(min egen lilla utmaning-att bara använda restpapper för dekoration av kort :))
En rad med filthjärtan fick oxå vara med, hoppas jag klarar portogränsen för ett frimärke ;)

Jultomte i gungstol, J 83

Ha det gott!!!

Kram Nettan

torsdag 1 september 2011

Födelsedagskort

Stämpelkällan fyller 1 år,

och det vill vi absolut fira så här kommer
Ett stort grattis från mig!


Jag har använt mig av restpapper och färglagt
"Trolla med tårta", S96 med Promarker.
Jag har också använt en av mina favoritstämplar:
"Grattis, med mörk bakgrund", T108

Ha en fantastisk dag därute, passa på att äta lite tårta - det är ju trots allt födelsedag :)

Många kramar Nettan


onsdag 31 augusti 2011

45-års kort

Fick en liten specialbeställning på ett grattiskort till en
"Dart-galen" kille, så här blev resultatet:


Ett runt stafflikort, det första jag gjort;) Jag har målat av och lackat pilen, stämpeln är naturligtvis från shopen :)
"Swirl med blomman åt höger" A37


Ha en bra dag! Kramar Nettan


tisdag 2 augusti 2011

Tuesday Tip/Tutorial


Jag tänkte "damma av" en teknik jag använde mig mycket av när jag började göra kort: Färgläggning med Kalkfärg.

Det här behöver man:
-Kalkfärg
-Vattenstämpeldyna
-Stämpel
-Tops
-Vitt papper

Börja med att stämpla upp ditt motiv med vattenstämpeldynan.


Sedan tar man färgerna man vill använda och målar i små cirkelformade rörelser med topsen. Det gäller att skynda sig lite granna så inte färgen hinner torka...


Jag valde att embossa med clear embossing ovanpå motivet - för att få "vykortskänsla" och för att det ska hålla bättre. Gjorde ett enkelt "braoha" kort utan text:


Stämpeln jag anväde heter: "Blomsterkrans" och finns i shopen.

Det var allt från mig för den här gången. Hoppas ni njuter av sommaren - det gör jag!

Kramar Nettan

måndag 1 augusti 2011

Monday sketch

Hi all!

It´s monday and time for a new sketch:


Here is some inspiration:


The stamp I have used is one of my favourites:)
"Kalaspingla som sitter"

Love Nettan

onsdag 20 juli 2011

Kondoleanskort/konfirmationskort


Här har jag gjort ett kort till konfirmation eller kondoleans.

Jag har använt stämpeln: "Kors" som finns i shoppen.

//Nettan

tisdag 12 april 2011

Tuesday-tips

Hejsan!

Idag är det tisdag och dax för tip/tuturial.
Jag tänkte försöka förklara hur man maskar stämplar, dvs kombinerar olika stämplar till ett motiv.

Hello!
Today is Tuesday and time for a tip / tuturial
.
I am going to try to explain how to mask stamps, that combines different stamps for one motive.

Du behöver:
- Sax - Skärunderlägg
- Skalpell - Post It/tunnt kopieringspapper
- Stämplar - Stämpeldyna

You will need:
- Scissors - cutting mat
- Scalpel - Post-It/thin copy paper
- Stamps - Inkpad


Först stämplar man motivet som ska vara längst fram på både kopieringspappret och det papper som ska vara på alstret.
Om man använder Post It, stämpla nära kanten så att klistret kan användas som tejp.

First you have to stamp the motive that will be at the front on both the copy paper and the paper that should be on the card.
If you use Post It, place it near the sticky edge so you can use the glue instead of tape.


Sedan klipper / skär man ut motivet på kopieringspappret.


Then cut out the motive on the copy paper.


Lägg det utklippta motivet över det andra och tejpa om det behövs.

Add the cut-out motive over the other and tape if necessary.


Nu är det dax för andra stämpeln. Stämpla där du vill ha motivet.

Now it's time for the second stamp. Stamp where you want your subject.


Så här ser det ut när det är stämplat.
Om man vill ha fler stämplar än två, gör samma procedur igen. Låt första vändans kopieringpapper sitta kvar.
Tänk bara på att börja med stämpeln som ska vara längst fram.


Here's how it looks when it is stamped.
If you want more stamps than two, do the same steps again. Le
t the first copy paper stay in place.
Just be sure to start with the stamp that will be up front.


När man är klar med alla stämplar är det dax att ta bort kopieringspappret och färglägga.

When you are finished with all the stamps it's time to remove the copy paper and color.


Här är mitt färdiga resultat, jag använde stämplarna: "Grind" och "Ludde med ballonger" samt färglade m Promarker.

Here is my finished result, I used the stamps: "Grind "and "Ludde med ballonger" coloured it with ProMarker.

Hoppas ni förstår min beskrivning :) och testar! Det är riktigt roligt när man väl fått kläm på det!

Kram Nettan

Hope you understand my description:) and try! It's really fun when you get the hang of it!

Hugs Nettan

måndag 11 april 2011

Sketch of the week

Hi all!

This week it's my turn to share a sketch
with you , which is the first time
for me
...


I did an LO to inspire, it is the second part of a double-LO from my daughter's birthday and family party.

I used the stamp:
"Muffins" (Cup Cake) as a dekoration
and coloured it with Promarker and put som 3D-paint on it.

Have a great day, see you tomorrow - then I'll show you a tutorial/tip that I just
fallen in love in :)

Hugs Nettan

onsdag 30 mars 2011

Birthdaycard

Hello!

I have made a birthdaycard to a friend whose main hobby is fishing.
I have used these stamps:

"Vilgot fiskar hjärta" and "Fisk, liten" but I changed the heart for a fish this time.


I used "Snow Writer" at the cloud and the halo as well as 3D paint on the fish.

I

Have a nice evening! Hugs Nettan

onsdag 9 mars 2011

Grattiskort

Hello!

My name is Nettan and I´m one of the new DT´s here at Stämpelkällan.
Here
is my first post - hope you´ll like it :)

I have made two cards,
The first card is for my son's 10th birthday. He is crazy about football and his favorite team is IFK Göteborg - Änglarna (Angels)
Therefore, the choice of the stamp: Vilgot fiskar hjärta wasn´t particularly difficult:) I was however so bad/crazy that I changed the heart for a football, sorry San:)
I used Bili´s sketch for inspiration and Promarker for the colouring.


I used "Snow Writer" at the cloud and the halo as well as 3D paint on the "dress"


The second card is for a lovely little girl after Monica´s sketch
I used the stamp: Älva-Freja vilar i gräset
I have been coloring it with Promarker and glittered it a little bit here and there to the recipient's delight:)


Have a woderful day!
Love Nettan